3D-printer with under 300 euros! RepRap Prusa i3 Rework
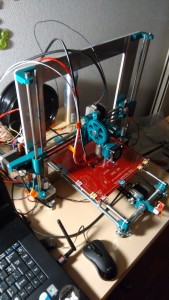
Decided to take a new project for summer (it actually took a lot longer as now is December): a 3D-printer. I have been dreaming of building one like last two years but now finally managed to get started.
Priorities:
- Cost optimized solution
- But still essential parts with good quality (aluminum frame, stainless steel smooth rods etc.)
- Budget ~300 €. Realistic estimate in BOM went pretty close but under! Thanks to recycled ATX-power supply.
Found ready kits from France for Prusa i3 Rework, that is with all parts but price was little too much: 550 € + shipping. Checked the Bill of Materials (BOM) from the reprap.org and started looking for components and availability of them around here in Vaasa. I found a lot of parts in local stores here and a lot ordered from eBay and Aliexpress. I wanted to include in this post a final BOM with comments (in Finnish). It’s messy but there it states that ready Prusa i3 Rework 3D-printer can be achieved with budget under 300€! In the link following the messy spreadsheet with prices, links, tips, comments, stores and some improvement ideas: Prusa_i3_Rework_BOM
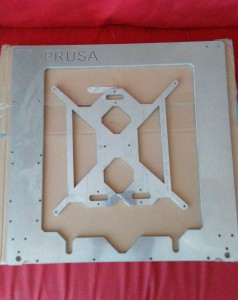
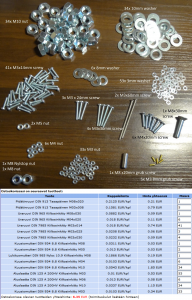
At first there were only some rods, nuts, screws and water jet cutted aluminum frame with RepRap RAMPS 1.4, clone Arduino Mega, endstops (= electronics needed for RepRap printers) and bought 3D-printed parts needed for the printer. One photo (that photo is actually taken from one eBay listing that I used when I created list before going to a hardware store) describes all needed bolts, screws, nuts, washers and listing to those parts and prices from one Internet shop. Photo has complete listing, but the list included into the same photo doesn’t.
So then was time for assembly. I followed RepRap instructions for Prusa i3 rework but more than that I followed this YouTube-tutorial where Prusa i3 Rework was built from zero to firmware flashing, calibrating and first test printing.
After all it is a working 3D-printer! Even printer was assmebled and ready to start using was still useful to do some troubleshooting as Z-axis wasn’t producing objects of the height it should. I found some tips that Z-axis acceleration rate should be set to lower like 15 or 10 (command M201 Z15 to test before flashing). After that my prints are that high like they should be.
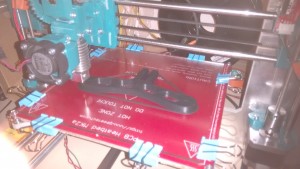
I use now for printing 1,75mm black ABS-plastic filament. Temperatures I have been using now in the beginning: heatbed +115 celsius and hotend +234 celsius for first layers and next layers +228 celsius degrees. Nozzle is 0,4mm and layer height 0,32mm and first layer 0,352mm. Still there is a lot tweaking to be done but some acceptable parts like filament spool mount I have managed to print with those settings.
On heatbed’s glass surface I use a good amount of hairspray as this blog post suggests by kengu. It works though if printed object is too close to the edge of glass, say under 3 cm then warping may occur from the glass surface. Keep the printed object as centered as possible and use a brim around printed object like for example 4 layers and it should help with the hairspray.
Further improvement ideas for the printer that I’m likely to do: Raspberry Pi to host the printer and an aluminum heatbed and for that extruder with an inductive sensor that allows usage of automatic heat bed leveling. But after all now I have the 3D-printer to start with!

 ‘
‘