ESP8266 on NodeMCU board + DS18B20 + ArduinoIDE + ThingSpeak
 It has been over a year since the publishing of the blog post about ESP8266 microcontroller, DS18B20 temperature sensor and ThingSpeak cloud of Internet of Things. It did gain huge audience and is still active in the comments. Time has passed and ArduinoIDE is now the easiest way to start using ESP8266. The fiddle with USB-TTL-adapters can also be skipped using ready made development boards for ESP8266. NodeMCU v1.0 board is one great example. It contains flash and reset buttons and an USB-connector for flashing and power.
Simple temperature logger for your wifi surroundings is actually quite simple.
- NodeMCU ESP8266 dev board, wifi-enabled microcontroller board with gpio
- DS18B20, maxim 1-wire temperature sensor
- 4k7 ohm resistor, some wire
- USB power source or alternatively 3v power source, for short term testing 2*1,5V AA batteries
In ArduinoIDE you need to install ESP8266 boards. In menu File -> Preferences add in the Additional Boards Manager urls field the url for ESP8266 boards. More detailed instructions: https://github.com/esp8266/Arduino
To use DS18B20 sensors you also need to install DallasTemperature library. In ArduinoIDE menu Sketch -> Include Library -> Manage Libraries.. search for DallasTemperature and install it.
Connect:
- NodeMCU 3v3 to the Vin of DS18B20
- NodeMCU D1 to the data of DS18B20
- NodeMCU GND to the GND of DS18B20
- a 4.7kOhm resistor between Vin and data of DS18B20.
Update the code with your:
- ThingSpeak Api-key
- WIFI AP name
- WIFI key
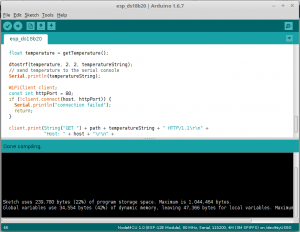
Select NodeMCU v1.0 as a board at the Tools -> Board menu. And flash away. I have been able to flash without pressing the flash and reset buttons so NodeMCU dev boards seems to be working great with ArduinoIDE.
There is also serial connection to read the temperature readings locally. Good for debugging purposes. Just use ArduinoIDE serial monitor at the right port and at 115200 bps.
The example code used in this sensor:
// ESP8266 DS18B20 ArduinoIDE Thingspeak IoT Example code
// http://vaasa.hacklab.fi
//
// https://github.com/milesburton/Arduino-Temperature-Control-Library
// https://gist.github.com/jeje/57091acf138a92c4176a


#include <OneWire.h>
#include <ESP8266WiFi.h>
#include <ESP8266WebServer.h>
#include <DallasTemperature.h>

#define ONE_WIRE_BUS D1


const char* host = "api.thingspeak.com"; // Your domain
String ApiKey = "THINGSPEAK_API_KEY";
String path = "/update?key=" + ApiKey + "&field1=";


OneWire oneWire(ONE_WIRE_BUS);
DallasTemperature DS18B20(&oneWire);

const char* ssid = "WIFIAP";
const char* pass = "WIFIKEY";


char temperatureString[6];

void setup(void){
  Serial.begin(115200);
  Serial.println("");

  WiFi.begin(ssid, pass);
  // Wait for connection
  while (WiFi.status() != WL_CONNECTED) {
    delay(100);
    Serial.print(".");
  }

  Serial.println("");
  Serial.print("Connected to ");
  Serial.println(ssid);
  Serial.print("IP address: ");
  Serial.println(WiFi.localIP());

  DS18B20.begin();


}

float getTemperature() {
  float temp;
  do {
    DS18B20.requestTemperatures();
    temp = DS18B20.getTempCByIndex(0);
    delay(100);
  } while (temp == 85.0 || temp == (-127.0));
  return temp;
}


void loop() {

  float temperature = getTemperature();

  dtostrf(temperature, 2, 2, temperatureString);
  // send temperature to the serial console
  Serial.println(temperatureString);

  WiFiClient client;
  const int httpPort = 80;
  if (!client.connect(host, httpPort)) {
    Serial.println("connection failed");
    return;
  }

  client.print(String("GET ") + path + temperatureString + " HTTP/1.1\r\n" +
               "Host: " + host + "\r\n" +
               "Connection: keep-alive\r\n\r\n");
  delay(500);

}
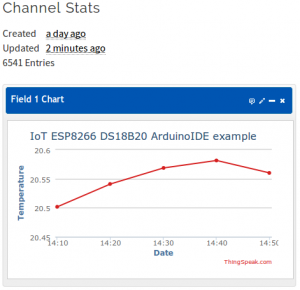
 You should now be receiving data into your ThingSpeak channel. The frequency of samples in this example is a bit too big. Once the system is up and running it is a good idea to add more delay in the system.
In ThingSpeak you can adjust the settings of graph and make it plot averages of say 10 minutes and receive nice graphs.
Of course you can use some other ESP board with the code, even the ESP01 as in the original example
There is also another example where ThingSpeak is replaced with MQTT and there is also simple to implement deep sleep in Jerome’s example, http://www.jerome-bernard.com/blog/2015/10/04/wifi-temperature-sensor-with-nodemcu-esp8266/


Hi and thanks a million for the tutorial!
After trying to get it running with a ESP-01, arduino nano etc I finally gave up and bought a nodeMCU card and now it seems to be working! Just wanted to say thanks!
Problem… first it was up dating ThingSpeak put suddenly… it’s quiet.. after few min.
code below…
// ESP8266 DS18B20 ArduinoIDE Thingspeak IoT Example code
// http://vaasa.hacklab.fi
//
// https://github.com/milesburton/Arduino-Temperature-Control-Library
// https://gist.github.com/jeje/57091acf138a92c4176a
#include
#include
#include
#include
#define ONE_WIRE_BUS D6
// const char* host = “api.thingspeak.com”; // Your domain
const char* host = “thingspeak.com”; // Your domain
String ApiKey = “CD8N0FYO7N5R3TCK”;
String path = “/update?key=” + ApiKey + “&field1=”;
OneWire oneWire(ONE_WIRE_BUS);
DallasTemperature DS18B20(&oneWire);
const char* ssid = “KILKE”;
const char* pass = “97dibmm2jrtem”;
char temperatureString[6];
void setup(void){
Serial.begin(115200);
Serial.println(“”);
WiFi.begin(ssid, pass);
// Wait for connection
while (WiFi.status() != WL_CONNECTED) {
delay(100);
Serial.print(“.”);
}
Serial.println(“”);
Serial.print(“Connected to “);
Serial.println(ssid);
Serial.print(“IP address: “);
Serial.println(WiFi.localIP());
DS18B20.begin();
}
float getTemperature() {
float temp;
do {
DS18B20.requestTemperatures();
temp = DS18B20.getTempCByIndex(0);
delay(100);
} while (temp == 85.0 || temp == (-127.0));
return temp;
}
void loop() {
float temperature = getTemperature();
dtostrf(temperature, 2, 2, temperatureString);
// send temperature to the serial console
Serial.println(temperatureString);
WiFiClient client;
const int httpPort = 80; // HTTP
// const int httpPort = 443; // HTTPS
if (!client.connect(host, httpPort)) {
Serial.println(“connection failed to Host ThingSpeak..”);
return;
}
client.print(String(“GET “) + path + temperatureString + ” HTTP/1.1\r\n” +
“Host: ” + host + “\r\n” +
“Connection: keep-alive\r\n\r\n”);
delay(16000);
}
What might be the problem.. any suggestions..
I am able to download this program to ESP-12E develop board and run normally but not able to download this to ESP-01, I import this tools to Arduino IDE to download:
http://arduino.esp8266.com/stable/package_esp8266com_index.json
When I download to ESP-01, it upload the program to the board but can not complete
No experience on using ESP-01 with Arduino IDE. A quick google search gives https://create.arduino.cc/projecthub/ROBINTHOMAS/programming-esp8266-esp-01-with-arduino-011389 and there seems not to be anything special.
Think you Miika
This connection is work when I download the program to ESP-01/ESP-01S with my Arduino Pro Mini, I am able to transport HTU21D temperature with ESP-01 to thinkspeak now
I can only write temperature data to thinkspeak, what wrong in my modify?
#include
#include “SparkFunHTU21D.h”
#include
#include
HTU21D myHumidity;
const char* host = “api.thingspeak.com”; // Your domain
//String ApiKey = “THINGSPEAK_API_KEY”;
String ApiKey = “xxxxxxxx”;
String path1 = “/update?key=” + ApiKey + “&field1=”;
String path2 = “/update?key=” + ApiKey + “&field2=”;
const char* ssid = “xxx”;
const char* pass = “yyy”;
char temperatureString[6];
char humidityString[6];
void setup(void){
Serial.begin(38400);
Serial.println(“”);
WiFi.begin(ssid, pass);
// Wait for connection
while (WiFi.status() != WL_CONNECTED) {
delay(100);
Serial.print(“.”);
}
Serial.println(“”);
Serial.print(“Connected to “);
Serial.println(ssid);
Serial.print(“IP address: “);
Serial.println(WiFi.localIP());
Wire.begin(0,2); //Use Io-0 & Io-2 as SDA & SCL
myHumidity.begin();
}
void loop() {
float temp = myHumidity.readTemperature();
float humd = myHumidity.readHumidity();
dtostrf(temp, 2, 2, temperatureString);
dtostrf(humd, 2, 2, humidityString);
// send temperature to the serial console
Serial.println(temperatureString);
Serial.println(humidityString);
WiFiClient client;
const int httpPort = 80;
if (!client.connect(host, httpPort)) {
Serial.println(“connection failed”);
return;
}
client.print(String(“GET “) + path1 + temperatureString + ” HTTP/1.1\r\n” +
“Host: ” + host + “\r\n” +
“Connection: keep-alive\r\n\r\n”);
delay(5000);
client.print(String(“GET “) + path2 + humidityString + ” HTTP/1.1\r\n” +
“Host: ” + host + “\r\n” +
“Connection: keep-alive\r\n\r\n”);
delay(5000);
}
At the front of definition:
#include
#include “SparkFunHTU21D.h”
#include
#include
Gee, that was easy! Thanks a lot for this post!
I needed to add OneWire -library like DallasTemperature -library, then it compiled and now is logging to thingspeak.
i advanced the read temp section, because if cable problem or something else, code gettin deep loop
i give ten try like that,
,
float getTemperatureDis() {
float temp;
int i=0;
do {
DS18B20Dis.requestTemperatures();
temp = DS18B20Dis.getTempCByIndex(0);
delay(100);
i++;//give it 10 try
} while ((temp == 85.0 || temp == (-127.0)) && (i<10));
return temp;
}